Pages

Roasted Pork Belly with Red Cook Flavors for Chinese New Year


Chinese New Year is just days away.  This year Chinese New Year lands on Thursday, February 3.  As a little girl growing up in Hong Kong, it was one of my favorite holidays as it is the most celebrated holiday in the Chinese culture.  Every family would gather for a reunion dinner the night before to feast on the many dishes that are made to represent good luck and longevity.   On New Year's day, we would visit families and friends to wish them prosperity and good health for the New Year.  Some would exchange gifts while the children or young unmarried adults receive red envelopes from the elders.  These red envelopes or "lai see" contain cash so we could use our lai see to buy toys and whatever we wish.

Once I moved to the States, my family still gather for a reunion dinner and receive lai see; however we do not follow the 15 days of festivities as we would while we lived in Hong Kong.  Since the celebration is shortened, our family tries as much as possible to get together.  As everyone's commonality is always food I thought I would post a recipe that I love for all to try to make for their New Year's eve reunion dinner.

This recipe is derived from a traditional red-cooking recipe which my family loves to make.  I think there are varieties of ways to make this dish as each family's recipe is different.  My dad is visiting from Hong Kong and I recently asked him how he would make his red-cook pork belly.  At first I thought I would try to make his version, but I thought though I enjoy the red-cook pork belly which is braised in dark soy sauce and rice wine with aromatics for hours until it's fork-tendered.  To me, the best part of the pork belly is the crackling, the crispy skin.  So I decided to roast the pork belly which would get the crispy skin but still use the ingredients of the red-cook to make a sauce. 

Roasted Pork Belly with Red Cook Flavors (Serves 4)
1 1/2 - 2 pounds of pork belly
1/2 tsp of five spice powder
Salt to season
Olive oil to coat the pan

Red Cook Sauce
1/4 cup of dark soy sauce
1/4 cup of Shao Xing rice wine or dry sherry
2 ounces of Chinese rock sugar*
6 slices of ginger
3 scallions - cut into 2 in pieces
2 cloves of garlic crushed
1 cinnamon stick crushed
1 star anise pod
1 cup of low sodium chicken stock
1/2 tsp of five spice powder
*You can find this in your local Asian market

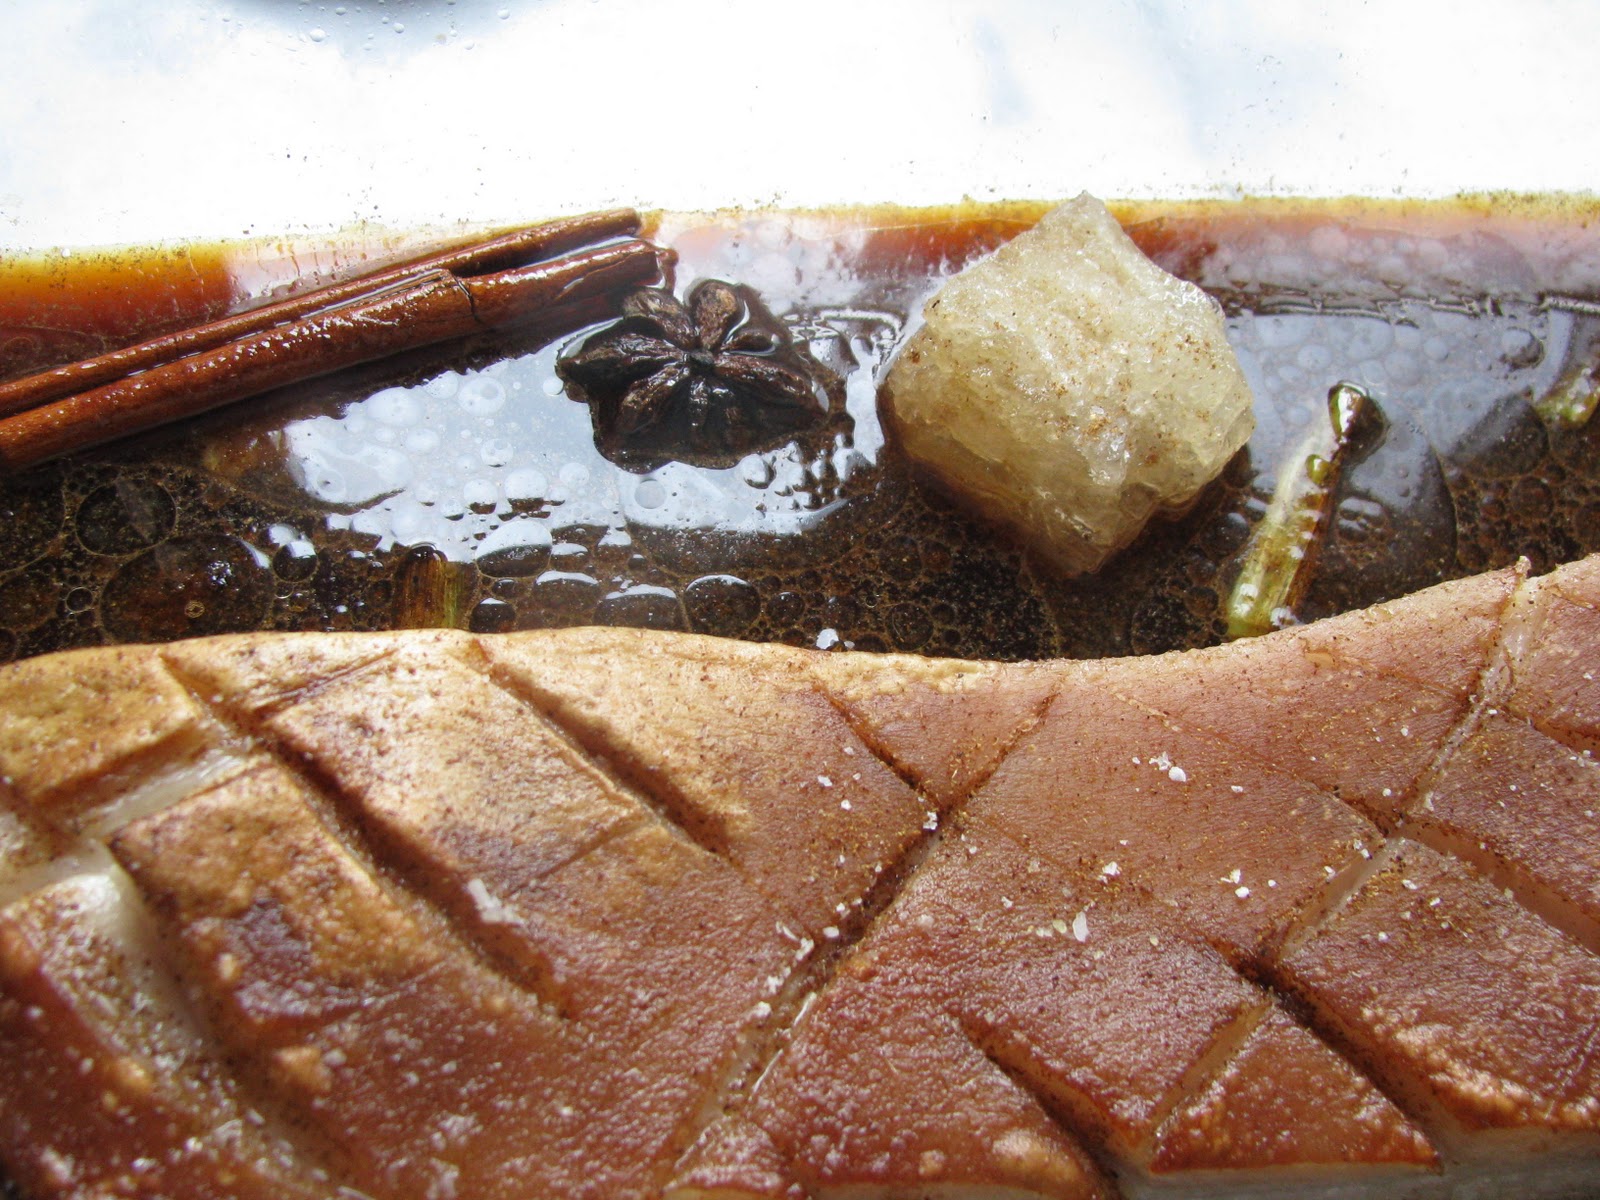
Pre-heat oven to 450 degrees.  Wash the pork belly in cold water then pat dry.  Score the skin with 1 inch diamond pattern.  Rub the 1/2 tsp of five spice powder and salt into the skin.  In the roasting pan, add oil to coat the pan, then add garlic, scallion and ginger.  Sit the pork belly on top of the aromatics and roast in high heat for 15 minutes.  After 15 minutes, lower the heat to 300 degrees.  Take the pork out, at this point you could see the pork skin is already getting crispy.  Add the wine, soy sauce, rock sugar, cinnamon stick, star anise, five spice powder and the stock into the pan.   Cover with foil and return the pan back to the oven to roast for at least 2 hours.  Take the foil off, increase the heat to 450 degree and roast for another 10 minutes until the skin is crispy.  Take the pork belly out and let it rest while strain the sauce.  Skim the fat off the sauce then reduce until thickens.  Cut the pork belly in pieces with a serrated knife, and serve with sauce.
I love the crispiness of the skin and the tenderness of the meat.  The sauce is flavorful and savory with a hint of sweetness.  You could serve this with your favorite vegetable and rice.  Happy Eating and Happy Chinese New Year or Kung Hai Fat Choi to all!

Fried Brown Sticky Rice Balls with Duck Sausage


I've been thinking about what I should make for the first post of the year.  While considering what dish to make, I have been fighting a serious cold for weeks.  As a result I've been craving for some comfort food.  Therefore, I decided to make something that I could eat to satisfy my own craving and still create a unique and interesting recipe.

During my last visit to my local farmers market, I bought some duck sausage which I stored in the freezer so I knew I want to use that as my main protein; however I didn’t want to make an entrĂ©e portion meal.  As mentioned in my past post, I love Chinese dim sum which consists of a variety of small portion appetizers to be enjoyed with tea.  I contemplated on what I could do with the duck sausage that may perhaps contain elements of a dim sum dish.  Then I thought I could do something similar to sticky rice and Chinese sausage.  However, the duck sausage that I bought already included some Italian seasoning so how do I tie all the ingredients together?  I know!  I could make sticky rice balls, roll them in panko and fry them so they almost resemble an Italian dish of fried rice balls.  After all fried food is my ultimate comfort food; though I do not eat it as often for obvious reason, but  I love the contrast of the exterior crunchiness and the interior tenderness.  So let the recipe testing begins!

I found some brown sticky rice in my local Asian market, so I use that rather than the traditional version of white sticky rice as it contains higher fiber content.  I also bought some dried Chinese black mushrooms to give a good earthy flagrant flavor, and of course it is one of the ingredients in the traditional sticky rice and Chinese sausage recipe.

Fried Brown Sticky Rice Balls with Duck Sausage (Yield approximately 40 balls)
2 cups of brown sticky rice (or regular sticky rice)
4 cups of low sodium chicken broth
1 lb of duck sausage (or substitute with sweet Italian pork or turkey sausage)
1/4 cup of diced dried mushrooms (approximately 6 medium size mushrooms)
1/2 cup of the soaking liquid for the dried mushrooms
1 tbsp of hoisin sauce
1 tbsp of oyster sauce
2 tsp of light soy sauce
2-3 cups of panko breadcrumb
Salt for seasoning
Canola oil for frying

Sticky rice takes longer to cook.  Rinse and wash the rice until the water runs clear.  Drain then cook the rice with the chicken broth in high heat until it comes to a boil.  I use chicken broth to flavor the rice but you could definitely use water.  Then lower heat, simmer for approximately an hour until all the broth is absorbed and rice is cooked completely.  In the meantime rehydrate the mushrooms by adding hot water to the dried mushrooms. Let them soak for at least 15-30 minutes until they're soft enough to trim the stems off.  Strain and reserve the soaking liquid, then cut the mushrooms in small dice.

The duck sausage I bought is without the casing so you could use the links but be sure to remove the casing.  If you can't find duck sausage, you could substitute with sweet Italian sausage; and you could skip the fat-rendering step.  Similar to preparing duck breast, you also have to render the fat of the duck sausage so place the duck sausage in a pan in low heat and slowly render the fat.  Reserve the fat to be included in the oil for frying.  After the fat is rendered, break up the sausage and add the diced mushrooms.  Saute the mixture for a few minutes, then add the mushroom soaking liquid.  Let it reduce then add the soy sauce, hoisin and oyster sauce to the mixture.  Once the mixture is cooked, let it cool and reserve to mix with the sticky rice.

Once the sticky rice is done, spread it onto a sheet pan to help cool faster.  When the rice and meat mixture are cool enough to handle, mix together.  Taste, if necessary, then correct seasoning.  Using a teaspoon, scoop the mixture and rolled into a ball similar to the size of a golf ball.  Since the rice is sticky it is best to keep your hands moist with water so the rice mixture won't stick to your hand.  Roll all the balls and place them on a parchment-lined sheet pan.

In the meantime combine the duck fat and canola oil (canola oil has a higher smoking point and less likely to burn quickly) in a dutch over or a deep pot.  Put enough to at least cover the size of the balls.  Heat oil to 375 degrees for deep frying.  It's a good idea to use a candy thermometer to monitor the oil temperature.  While the oil is heating, season the panko breadcrumb with at least a teaspoon of salt and roll each ball to the breadcrumb.   Once the temperature is hot enough, fry several balls at a time, do not crowd the pot and fry them in batches.  Drain them on paper towel and serve immediately. 


These fried sticky rice balls are tasty little morsels and really great with your favorite hot sauce.  I ate these with Sriracha (Thai hot sauce).  They have the taste of the traditional sticky rice and sausage dish; but with the added crunch of the fried rice and panko.  These are perfect for snacking. Not only do they satisfy your fried-food craving; but also, in my case, cured my culinary nostalgia.

Related Posts Plugin for WordPress, Blogger...