Pages

Showing posts with label Sweet Recipes. Show all posts

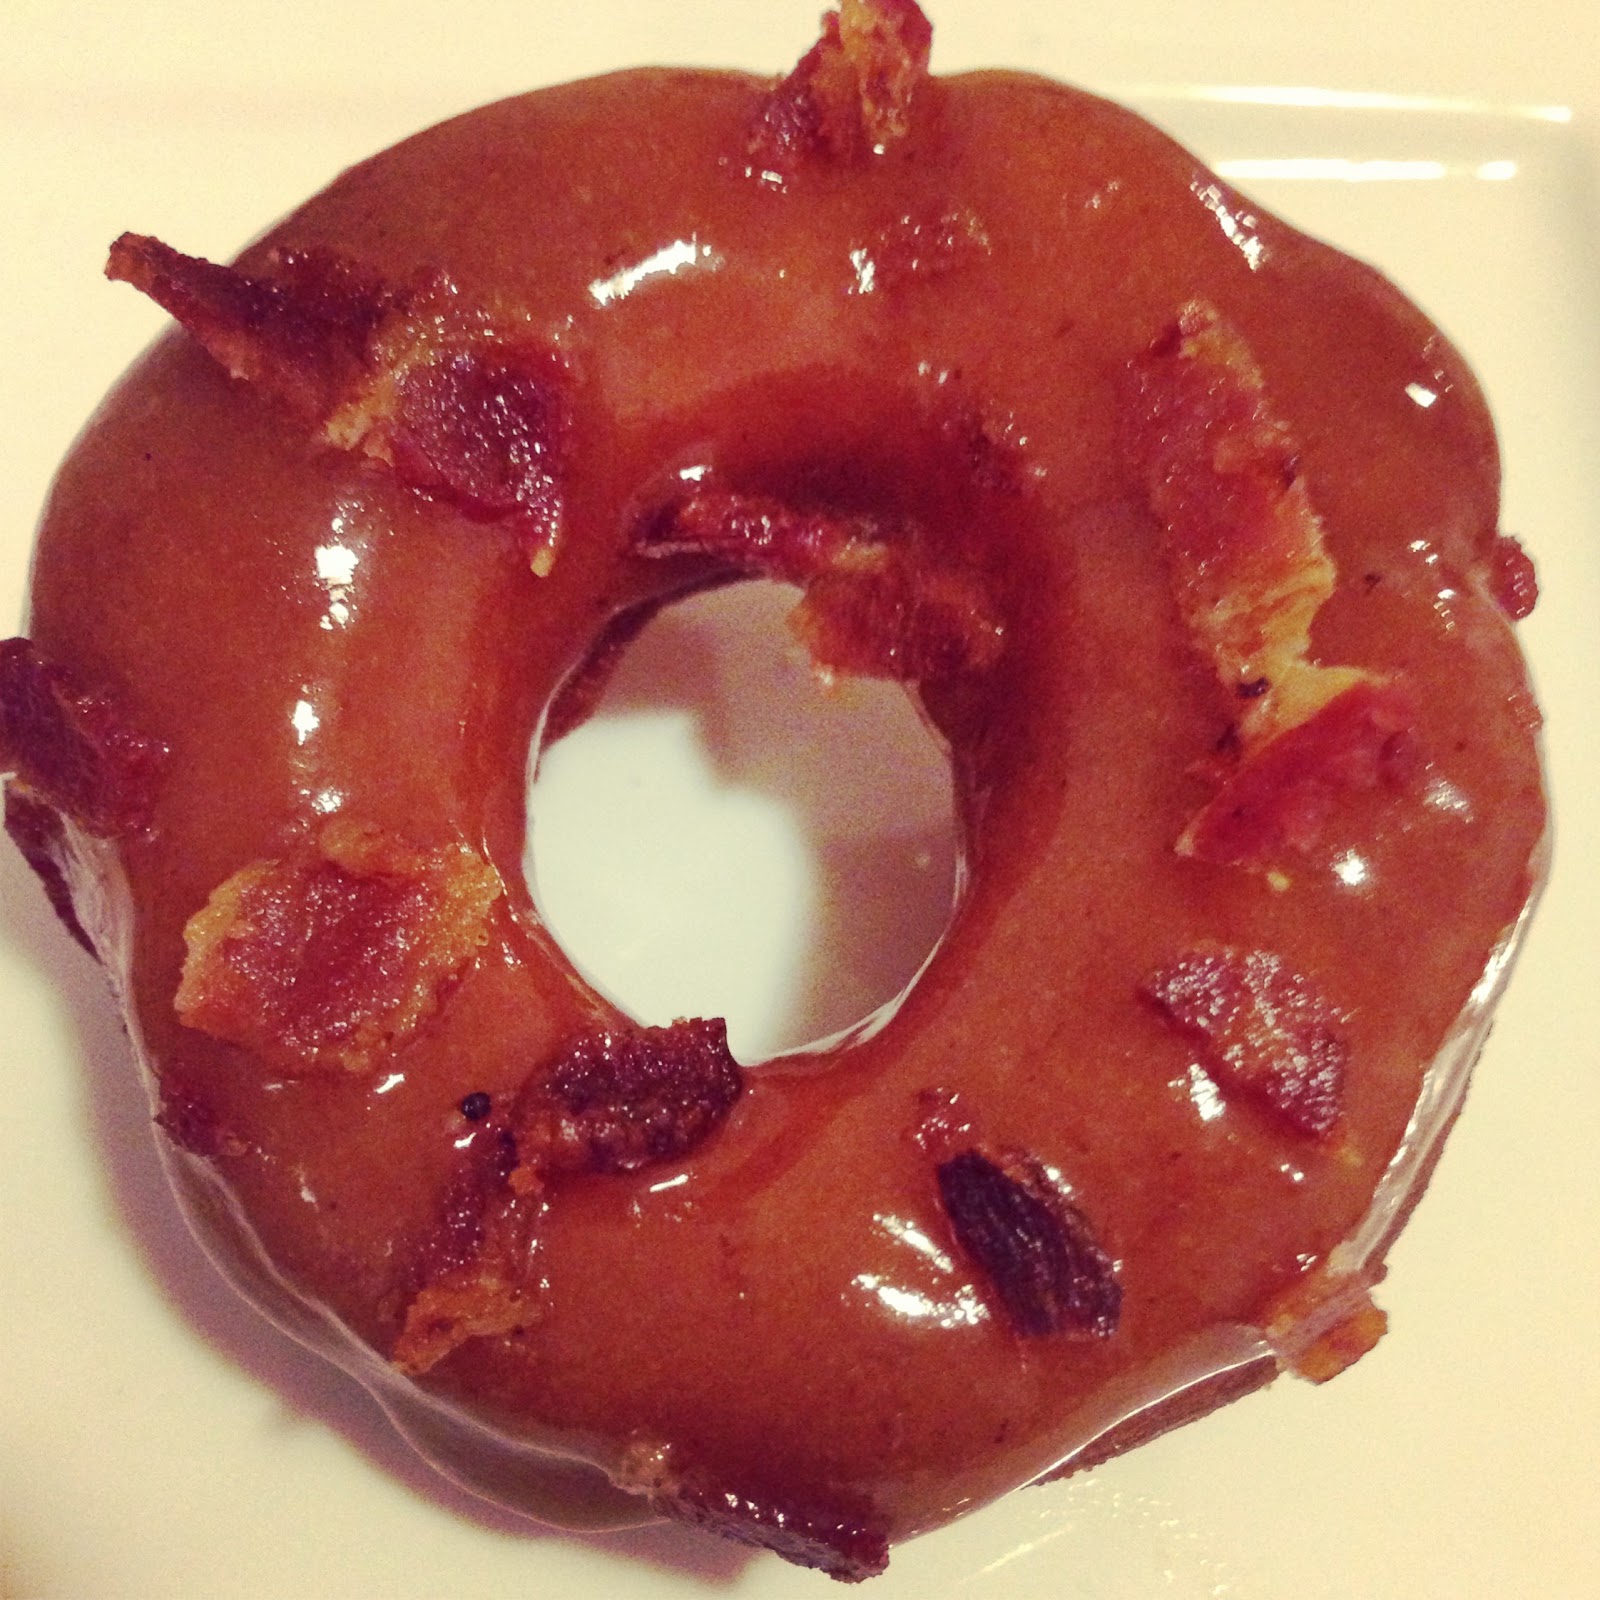
Apple Butter Bacon Doughnuts

Apple Butter Bacon Doughnut
Have I mentioned I love summer?  Maybe it's because I was born in a summer month and grew up in a warm climate.  I love the heat and the sun so I'm especially happy when summer is near.  This weekend is Memorial Day weekend in the U.S., many will spend their long weekend outdoors.  Your ovens may be taking a break from the heat too as many head outdoors to grill and cook their meals.  I wish I could be one of those lucky people.  I don't have a grill so grilling at home is out of the question, but it doesn't mean I can't enjoy making something that I can bring to a picnic or a barbecue.

So when Musselman's Apple Butter reached out to see if I would do a post about summer cookout menu using their apple butter, I thought even though I can't grill I could make something that could be enjoyed in the summer.  Summer also reminds me of festivals and amusement parks.  When I go to street festivals, I almost always get myself some fried dough covered with powdered sugar.  As some of you may know, I don't have a sweet tooth, but I love fried desserts especially doughnuts.  I remember I have taken a bacon lovers cooking workshop at ICE, and one of the dishes we made was the Maple Bacon Doughnuts.  I've wanted to make them, so when I received a jar of apple butter from Musselman's, I thought the apple butter would make a delicious glaze; and since I like my sweets with a salty element, the bacon would go really well especially with the apple butter.  By the way for those who are wondering, apple butter has no butter in it.  Apple butter is more concentrated and caramelized version of apple sauce.  It's spreadable like butter hence the name apple butter.

Apple Butter Bacon Doughnuts - Yield about 12-14
Doughnut Recipe - Adapted from Alton Brown's Yeast Doughnut recipe
12 ounces all-purpose flour, plus more for dusting
3/4 cup of milk
3 tbsp. of warm water
2 1/2 tbsp. of vegetable shortening  
1 package of instant yeast
2 tbsp. of sugar
1 egg, beaten
1/2 tsp. salt
1/2 tsp. freshly ground nutmeg
Vegetable oil for frying

Apple Butter Glaze with Bacon
1/2 pound of powdered sugar
1/2 cup of Musselman's apple butter
1/2 tbsp. of vanilla extract
Juice of one lemon
4 strips of crispy cooked bacon, crumbled 

Start with putting the milk in a saucepan and heat until warm.  Pour the milk in a bowl and add the shortening until it melts.  While the milk mixture cools, in another small bowl; add the yeast powder and warm water.  Dissolve for at least five minutes, Put the yeast mixture into the stand mixer bowl, and add the cooled milk mixture, sugar, egg, salt, nutmeg and half portion of the flour.  Fit with the paddle attachment to the mixer; combine on low speed until all ingredients are incorporated then turn the speed up.  Beat until well combined then add the remaining flour.  Repeat with low speed then turn the speed up to medium for a couple more minutes.  Then change to a dough hook attachment, set to medium speed until you see the dough starts pulling away from the bowl and a ball is formed.  Put the dough into a well-oiled bowl.  Cover and let rise for at least an hour until it doubles the size.  

Roll out dough to 3/8 inch thick on a well-floured surface.  Cut out dough using a 2 1/2-inch doughnut cutter.  If you don't have a doughnut cutter, you may want to get one.  I found them in Sur La Table for $4 and it really makes cutting out the doughnuts super easy.  Place them on floured baking sheet, cover lightly with a towel and let them rise for another 30 minutes.

Preheat the oil in a deep fryer or a Dutch oven to 365 degrees. Gently place the doughnuts into the oil, a few at a time. Cook for 1 minute per side. Transfer to a cooling rack and let it cool for at least 10-15 minutes before glazing.
For the glaze, whisk the apple butter, powdered sugar, vanilla extract and lemon juice together until smooth.  Once the doughnuts are cooled enough to glaze, immerse each top half of the doughnut into the glaze.  Once all the doughnuts are glazed then crumbled bacon all over the top of the doughnuts.

I love the sweetness of the delicious apple butter. The lemon juice adds a little tartness and brings out the apple flavor, and of course I love the saltiness of the bacon which balances really well with the sweetness of the apple butter.  The doughnut is light and flaky.  This is definitely a delicious treat to eat any time especially at picnics and cookouts in the summer.  Hope you enjoy these and have a wonderful holiday weekend!  


Black Sesame Ice Cream with Profiteroles and Yuzu Ginger Curd

I have recently returned from a trip to Tokyo and Hong Kong.  During that trip, I have experienced some amazing meals.  To my surprise, as I don't eat lots of sweets, I was very drawn to the desserts in Asia as they are not super sweet.  I grew up eating these not so conventional ingredients that are used to make desserts such as red bean, green tea, ginger and black sesame.   I specifically love the taste of the black sesame and really want to make something with this ingredient.

That opportunity presented itself recently when I was asked by Diana Kuan who has a new book The Chinese Take Out Cookbook to help her celebrate Chinese New Year by hosting a Chinese New Year Virtual Potluck.  She listed seven recipes from her new book and told me that I could choose any of those recipes to make a dish then post it on my blog.  I thought for sure I would like to make a noodle dish since I am somewhat obsessed with eating noodles.  I crave it almost every day, instead I chose the black sesame ice cream as I am a huge fan of black sesame.  It has such a distinct flavor and I love the nuttiness of it.
I thought I would use the ice cream to make a composed dessert with contrasting flavors and texture; and who doesn't like an ice cream sandwich so I used profiteroles here.  I also love some citrus flavor or sourness to my desserts to cut the sweetness.  I have some yuzu juice in the fridge, so I thought I should make a sauce.  I found a really simple lemon curd recipe from my culinary school days and adapted it to make the yuzu ginger curd.  Hope you like it and I highly recommend checking out Diana's new book as she has many wonderful recipes that I'm sure you will enjoy making.

Black Sesame Ice Cream with Profiteroles and Yuzu Ginger Curd
Black Sesame Ice Cream (from The Chinese Take Out Cookbook by Diana Kuan) Yield 1 Quart
2 cups of heavy cream
2 cups of whole milk
3/4 cup of sugar
1/4 cup of black sesame seeds
1/2 tsp of pure vanilla extract
1/8 tsp of salt

Special equipment
Ice Cream Maker
Spice Grinder

Combine 1 cup of the heavy cream, sugar and salt in a medium pot over medium-low heat. Stir until the sugar is full dissolved.  Pour the ice cream mixture into a bowl. Stir in the remaining 1 cup of heavy cream, milk and vanilla extract.  Cover the mixture and chill in the fridge for a least 3 hours or overnight.  When the mixture has chilled, grind the sesame seeds in a clean spice grinder.  Pout the mixture into your ice cream maker, slowly pour in the ground black sesame and churn according to the manufacturer's instructions.  Transfer the ice cream to a freezer-safe container and freeze for at least 4 hours or overnight.

Profiteroles (yield about 18)
1 cup of water
1 stick of unsalted butter
1 cup of all purpose flour
4 large eggs
2 tbsp of granulated sugar
1/2 tsp of salt

Preheat oven to 350 degrees.  Combine the water, butter, sugar and salt in a medium pot, bring it to a full rolling boil, stir occasionally.  After the boil, take the pot off the heat and add all the flour, stir until smooth.  Put the pan back on low to medium heat and cook, stir constantly until the the dough dries and pull to the side of the pot.  Take it off the heat and let it cool.  Put the dough into a mixer fitted with a paddle.   Add one egg at a time, mix until the egg is completely absorbed before adding another egg.  Once the eggs are completely mixed in.  Place the dough into a piping bag and pipe the dough to about 1 1/2 inch rounds onto a slip pad-covered cookie tray.  Bake about 15-20 minutes until slightly golden brown.  Cool and set aside.

Yuzu Ginger Curd (yield about 1/4 cup) Adapted from Nick Malgieri's lemon curd recipe
3 large egg yolks
1/4 cup of yuzu juice
1/4 cup of granulated sugar
2 tbsp of unsalted butter
2 tsp of grated ginger

Combine the yuzu juice, sugar and butter in a sauce pan and bring to a boil over medium heat. Whisk the egg yolks in a separate bowl.  Add one quarter of the boiling liquid into the egg yolks to temper the yolks. Return the remaining liquid to a boil over low heat.  Whisk the egg mixture into the pot and whisk until it thickens.  Add the grated ginger.  Continue to whisk, do not allow the curd to boil or it will scramble.  Transfer the lemon curd into a clean bowl, press plastic wrap against the surface to prevent a skin from forming.  Chill and set aside.

To assemble, cut the profiterole in half, sandwich it with a scoop of the black sesame ice cream then put some yuzu curd on the plate.

I am loving the deliciousness and toastiness of the black sesame ice cream.  Thank you Diana for asking me to try one of your recipes.  It's been fun being a part of this Chinese New Year Virtual Potluck.


New York Cookie Swap and Corn Cookies

November went by in a flash as I spent two weeks eating my way through Vietnam; I came back and was thrust into the beginning of the holiday season.  First it was Thanksgiving, and now the Hanukkah/Christmas season is upon us.  Before I left for my trip to Vietnam, the second annual cookie swap tickets went on sale, and I made sure I got a ticket before I left.  I was fortunate to be invited to the first cookie swap, and met so many wonderful bakers and bloggers.  This year's event was hosted by Bloggers Without Borders, Maggie, Gail, Ken and Jackie and took place at Hill Country restaurant in NYC a couple of weeks ago.  The event also raised money to benefit Cookies for Kids Cancer.

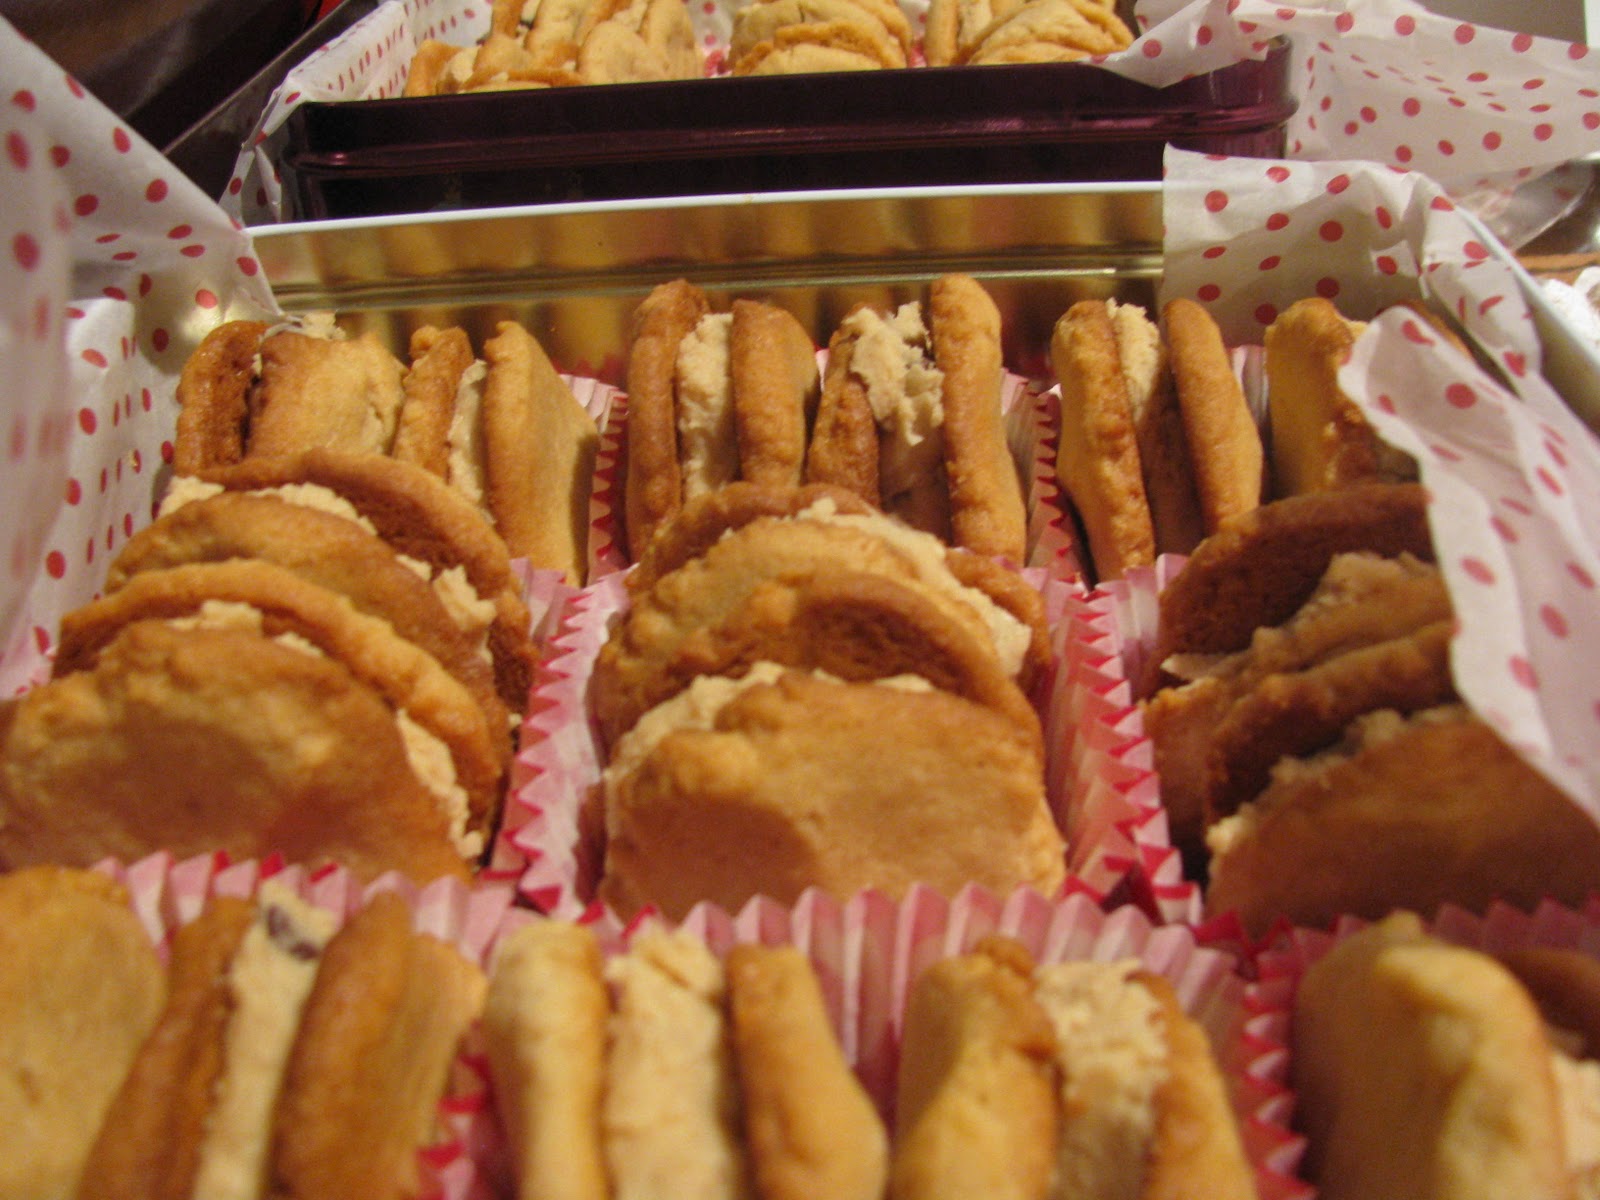
Below are samples of the gorgeous and tasty cookies that some of the talented bakers and bloggers brought.
Like many cookie swaps, you bring your batch of cookies and share with everyone.  At the end of the swap, you'd go home with a variety of cookies.  As many of you know I'm a novice baker, and I often make savory dishes on my blog.  Baking is not my thing at all; therefore, to come up with cookies to bring to this swap when there are professional bakers attending was extremely intimidating.  After I came back from Vietnam, other than fighting jet-lag, I pondered on what type of cookies I should make.  Coincidentally, I received my second edition of Lucky Peach Magazine.  Lucky Peach is a quarterly food journal published by McSweeney.  The creators of the magazine are David Chang and Peter Meehan.  As I was thumbing through my new copy of the journal, I came across a corn cookie recipe by Christina Tosi, pastry chef/owner of Momofuku Milk Bar.  I read the recipe and not only did I think I could make this, but I was really intrigued by the concept of this cookie recipe as it suggests that it tastes like eating corn on the cob.  The only ingredient that I had trouble finding was freeze-dried corn.  The recipe asks to use regular freeze-dried corn instead of the organic kind because the flavor is richer.  Other than ordering it online, I was only able to find the organic freeze-dried corn by Just Tomatoes at Whole Foods and Mrs. Green.  At the suggestion of my friend Ken (aka Hungryrabbitnyc), I added more corn powder to increase the intense flavor that the organic freeze-dried corn may lack.  These cookies were really fun to make and they came out pretty good. 
Corn Cookies - yield approximately 18 cookies
8 oz of Pulgra* room temperature butter (2 sticks)
1 1/2 cup sugar
1 egg
1 1/3 cup flour
1/4 cup corn flour
**3 oz of freeze dried corn grind to powder (after grinding in a food processor, it yields about 1 1/8 of a cup of corn powder)
3/4 tsp baking powder
1/4 tsp baking soda
1 1/2 tsp kosher salt

*Pulgra butter contains a bit more butterfat than regular butter.  If you can't find Pulgra butter, you can use regular butter.
**If you're able to find regular freeze-dried corn then use 2/3 of a cup of corn powder

Cream the butter and sugar in the bowl of a stand mixer fitted with the paddle attachment on medium-high speed for 2 to 3 minutes.  Scrape down the sides of the bowl.  Turn the mixer to a lower speed, add the egg then turn it back to medium high and let it mix for 7 to 8 minutes.  Once the creaming processing is done, reduce the mixer speed to low and add all the remaining dry ingredients.  Mix no longer than 1 minute, and the dough is ready to be divided.

Using a 2 3/4 oz ice cream scoop (or a 1/3 cup measure), portion out the dough onto a silpat or parchment-lined sheet pan.  Wrap the sheet pan tightly in plastic wrap and refrigerate for at least 1 hour, or up to 1 week.  Do not bake your cookies from room temperature especially when you make a cookie with so much butter; otherwise the butter will melt too quickly.

Heat the oven to 350°F.  Arrange each cookie at least 3 to 4 inches apart on a parchment or silpat-lined sheet pans.  Bake for 16 - 18 minutes depending on the oven.  I usually rotate the sheet pan during the half way point for even baking.  After 16 - 18 minutes, they should be lightly browned on the edges, and yellow in the center.  Let cool then serve or store up to at least five days.

I love that these cookies have this really intense corn and buttery flavor.  It does remind me of eating corn on the cob.  Now I want to get to the Milk Bar and taste their corn cookies,

With my cookies in tow, I went to the swap, and was simply in awe by all the cookies that were made especially the ornament cookie tree by Gail (as seen in the photo above).  The swap was a big success, and many tasty cookies to be had.  Elizabeth Karmel and Hill Country provided an amazing lunch for us which included their briskets, ribs, BBQ chicken, sweet potatoes, corn pudding, mac and cheese and cucumber salad.  It was a delicious feast.  I do; however favor the brisket and the corn pudding.  I was lucky enough to win a gift certificate for lunch during the raffle prize drawing, and I can't wait to go back to Hill Country for more brisket and corn pudding.  It was a fun-filled day of gathering of the food community to see old friends and meet new ones.  It was a wonderful way to begin the holiday season.

Tea Time - Vanilla Cupcakes with Passion Fruit Cream Cheese Frosting


This past Sunday, I participated in Tristin and Tyler's fashion photo shoot for an upcoming issue in Babiekins Magazine, a children fashion and design magazine.  Tristin and Tyler are 7 year old twins who have their own web series called "Tristin and Tyler's Tales from the City!". They promote green living and teach other kids how to have fun in the big city.  The busy Eco twins also started modeling for children fashion; and for this photo shoot, one of the themes is a kids' tea party, so I provided cupcakes and finger sandwiches as the backdrop (and snack).

As you may know I am a novice baker and only started baking a few years ago.  Even though these cupcakes may serve as the backdrop of a photo shoot, I thought it would be better to make them from scratch.  Besides making cupcakes from scratch is really not that difficult, and these ingredients are usually in your pantry/fridge already.

My go-to cupcake recipe is from Alan Richardson and Karen Tack of Hello, Cupcakes.  I got the recipe from watching Karen Tack on one of my favorite food channels demonstrating her basic vanilla cupcakes recipe.  It looked so simple to make; so I made them and now it is one my favorite recipes.


The cupcakes are light and moist, and not too sweet.  As to the frosting, I adapted from a cream cheese buttercream frosting from Angie Dudley at Bakerella.com; another simple recipe that anyone could do.  But instead of using vanilla to flavor the frosting I came across some purple passion fruits and as a big fan of this flavorful fruit, I added some purple passion fruit juice to the frosting instead.  Result - delicious!

Basic Vanilla Cupcakes - Recipe by Alan Richardson and Karen Tack of Hello, Cupcakes (yield 18 cupcakes)

1 stick of butter (8 tbsp - softened, room temperature)
1 cup of sugar
3 eggs

Dry Ingredients
2 1/2 cup of flour
1/2 tsp of salt
2 tsp of baking powder
1/2 tsp of baking soda

Wet Ingredients
1/2 cup vegetable oil
1/2 cup of milk
1 tsp of vanilla extract

Preheat oven to 350 degrees.  Whisk all the dry ingredients together in a bowl, set aside.  Then in another mixing bowl, whisk all the wet ingredients and set aside for later use.  In a standing mixer or use a hand mixer in medium speed, cream the room temperature butter and sugar together until smooth.  Then add one egg at a time until each is well incorporated before adding the second egg.  After the eggs are mixed, alternately add the dry ingredients (be sure to add the dry ingredients first), then the wet ingredients to the egg mixture.  Repeat the process until you end up with adding the dry ingredients last.  Pour the batter into a pastry bag to make it easier and less messy to pour into the lined cupcakes molds.  Dispense the batter 2/3 full into each cupcake mold and bake for at least 15 to 20 minutes.  Cool cupcakes on a rack before applying frosting.


Purple Passion fruit Cream Cheese Frosting - Adapted by Angie Dudley at Bakerella.com (make enough to top 18 cupcakes)

1 package of cream cheese (8 oz - softened, room temperature)
1 stick of butter (8 tbsp - softened, room temperature)
1 lb of confectioner's sugar
3 tbsp of fresh squeezed purple passion fruit juice (approximately 6 passion fruits) 

Cut the passion fruits in half, scoop the seeds and pulp with a spoon.  Strain the juice by pressing pulp with the spoon over the strainer.  While the juice is straining, cream the room temperature cream cheese and butter together in a stand mixer fitted with a paddle until the mixture is creamy.  Put the mixer on low, then slowly add the confectioner's sugar.  After the mixture is well incorporated, add the fresh passion fruit juice then increase the mixer speed to medium.  Mix the cream until it turns light and fluffy about a couple of minutes.  Once the frosting is finished, fit the pastry bag with a star piping tip.  Fill the bag with the frosting and hold it upright.  Start piping the frosting along the edge of the cupcake first. Then work your way into the center.  I also top my cupcakes with some fun store-bought decorations.

The photo shoot was a lot of fun, and here's a sneak peak with some of the shots I took.  I can't wait to see Nicole Taylor's pictures, so great to meet her and her story of how she became a professional photographer was inspiring.  I also loved meeting the antique shop owner Gregory Cole of Gregory Cole Antique Shop in Norwalk, CT.  If you're in the neighborhood, be sure to visit him.  He provided the furniture and space for the photo shoot.  I had an interesting conversation with him about blogging and social media.  I hope to see him add a blog to his store's website; and maybe even see him on the Twitterverse in the near future. Finally, I want to thank Props for Today for lending me the beautiful tea set that completed the tea time table!


Cookie Swap - The Ultimate Cookie Party

As the holiday season begins, many are baking special treats and traditional holiday cookies.  I was especially excited this year to bake since I was invited to my first-ever cookie swap that was organized by Chris & Karen from The Peche, Maggie from Three Many Cooks, Gail from One Tough Cookie and Abby Dodge.

The idea of this swap is brilliant as each person is responsible to bake and bring 3 dozen cookies of their choice.  As a novice baker, I was a bit intimidated by all the experienced bakers that will be at the swap so I decided I would make something that I made in the past - Pecan Balls.  This cookie is relatively easy to make and I know they are especially tasty. After all, you can't go wrong with butter and pecans.
The cookie swap was such a blast, not only did I had the pleasure of eating some amazing cookies but the best part was to meet new food bloggers in person and reacquaint with those whom I already met.  It was definitely nice to get together with people who share your passion and celebrate with cookies.  In addition to all the fun at the party, I was able to bring home dozens of cookies afterward which was definitely an added incentive.  So for this holiday season if you are thinking about baking some cookies, why not get together with your friends and families and have your own cookie swap.  To inspire you to bake, please see the recipe links to some of the cookies we had at the swap at the end of this post.

What an incredible spread!
Hope you try some of these amazing cookie recipes and Happy Baking! 

Chocolate Bite with Candy Kisses
Salted Praline Batons
Black & White Kisses
Peppermint Crusted Chocolate Candy Cane
Nutella Chip Cookies with Homemade Nutella Chips
Mint Choclate Grasshopper Squares
Chocolate Chunk with Pecans & Walnut Cookies
Oatmeal Yogurt Raisin Chocolate Chip Cookes
Jam-Filled Bow Tie Cookies
Peppermint Chocolate Crinkle Cookies

Egg Custard Tart

As I mentioned before, I'm not a baker and I prefer savory than sweet.  However, ever once in awhile I like to try my hands at baking.  So this time I thought I would go back to basics and make one of the most popular Chinese dessert recipes.  A dear friend of mine has given me some Chinese cookbooks as I thumbed through these books to get recipe ideas,  I found this one by Ellen Leong Blonder.  This recipe is really easy and it takes no time to make.  I did make some changes to the recipe.  For the tart crust, I substitute lard with butter.  I also added some lime zest and nutmeg to the topping of the tart to give it a more distinct flavor.

Egg Custard Tart inspired by Ellen Leong Blonder

Tart Crust
1 cup all purpose flour
1 tbsp of sugar
6 tbsp of butter (cubed and keep cold)
1/4 cup of ice water, plus a few teaspoons if needed

Egg custard filling
2 large eggs
1/2 cup of sugar
1/2 cup of milk
1/2 tspn of vanilla extract
Grated nutmeg
Grated lime zest

Preparing the crust:
When I read the recipe, it reminded me of the tart dough I made in my baking classes.  It was drilled into my head that when making tart crust to be sure to work fast and keep the butter cold.  So after I cubed my butter, I put it in the fridge to keep cold.  Furthermore, put the mixing bowl in the fridge so when it's ready to put the ingredients together, it'll stay cold.  Sift the flour and sugar together in the cold mixing bowl.  Then add the cold butter.  Mix the ingredients with a standing mixer and mix in slow speed.  Then slowly add the ice water.  Once the dough starts to gather, take it out and roll it into a ball.  Try to spend as less time as possible to roll the dough with your hands, as the heat of your hand could warm the butter in the dough.  Then flatten it out, wrap with plastic and put in the fridge.  Let the dough rest in the fridge for at least an hour, preferably two hours.

After the dough is rested, flour the working surface and rolling pin.  Roll the dough out until the dough is about 1/4 inch thick.   You'll see the small pieces of butter in the dough which makes the pie crust flaky.  Gently place it onto your tart tins.   According to the original recipe, she used twelve 3 1/4 inch tart tins.  Since I only had 4 x 1 inch tart tins, I was only able to spread my dough onto 5 tins.  Press the dough lightly into the tin, then refrigerate until the filling is made.

Preparing the custard:
Whisk all ingredients except the nutmeg and zest, let stand 15 minutes.  Preheat oven to 325 degrees.  After 15 minutes, Skim off any bubbles on the custard surface.  Then pour mixture evenly to each tart.  Grate the nutmeg on the top and bake tarts for 30-35 minutes.

After the tarts are baked, let it cool for at least 5 minutes before taking them out of the tart tins.  Transfer to a cooling rack then grate lime zest on top and serve at room temperature.

These egg custard tarts are not too sweet but really satisfy your sweet tooth.  The tart crust is light, buttery and flaky.  You can really taste the eggs in the custard even though there are only two eggs.  The lime zest gives a light citrus flavor which balances really well with the sweet nutmeg.  So if you are a egg custard tart lover, hope you'll try this lighter and easier version.

A season for baking


As you know, I have never baked in my life until culinary school. I have always preferred savory than sweet.  However since my pastry classes in school, I have grown to love baking and have occasionally made some wonderful sweet treats.

As this holiday season is fast approaching, I decided to make one of my favorites which is pecan balls. When you bite into it, it is light as air.  The cookie melts into your mouth then you taste the crunchiness and the nuttiness of the pecans which makes them a perfect combination. Other than being so delicious, I think they are my favorites because they are so easy to make. Also since they are covered with confectioner’s sugar, they look so festive during the holiday season. They are a great treat to give to your friends and families. So here's the recipe for any of you who wants to try your hands at baking something delicious in no time. I assure you everyone will love these and will want the recipe.

This recipe makes approximately 60 balls. I recommend using a scale if you have one since it's the most accurate.

1 pound of unsalted butter (4 sticks - room temperature)
3/4 cup of granulated sugar
1 1/2 teaspoon of salt
1 tablespoon of vanilla extract
1 tablespoon of water
1 1/2 pounds (5 cups) of all purpose flour
1 cup of chopped toasted pecan
1 to 2 cups of confectioner's sugar

Preheat oven to 325 degrees.
Cream the butter with the sugar and salt with either a hand mixer or stand mixer.
Once the sugar is incorporated into the butter, add the vanilla extract, then water. Gradually add flour and mix to incorporate. Once you see the flour is well mixed into the butter then add the pecans. Do not over mix.

Spray 2 cookies sheets with non-stick spray and put aside.
To portion the cookie, you may use a teaspoon.
Roll each portion in the palm of your hands to make a walnut-sized ball.
Place each ball an inch apart on the cookie sheet so when the cookies spread, they won't stick together.
 
Bake for about 20 minutes or until the bottoms are lightly browned.
I also suggest after 10 minutes, rotate each tray to avoid uneven baking. If you are using multiple racks in the oven, they may take longer than 20 minutes.

After the cookies are done, transferred them to a cooling rack. When they are completely cooled, roll them in the confectioner's sugar.

Enjoy!

My love for all things fried, starting with Beignets.

For those who know me, I'm not a huge fan of desserts. I take savory over sweet any day. I have never baked any cookies or cakes or made any desserts until my pastry module in school last year. It was an overwhelming experience for me. I was totally intimidated. I know how to cook but making pastries and cakes? That's just not my thing. I was afraid I would be terrible at it. I confessed to my chef instructor right away, and he reassured me that it's ok, we can get through this together. I still remember him telling me not to be afraid of the dough when I was rolling out my puff pastries and bread dough. Through the guidance of my patient instructor, Chef Jeff, I became more confident and started to enjoy making desserts.

So from time to time, I experiment, this time I made beignets as these little fried dough are one of my absolute favorites. I love all things fried, fried chicken is the ultimate comfort food for me. As to dessert, topping my top 5 list has to be beignets.

A few years ago, I went to a local French restaurant. As we sat waiting for our first course to arrive, I saw these mini copper pots filled with beignets and I couldn't keep my eyes off of them as it seems everyone around us was ordering them for desserts. So of course I had to have them, and they are the most amazing little bites I've had. These beignets are stuffed with chocolate truffles! As you put one in your mouth, the warm chocolate just melts in your mouth along with the soft puffy dough, it was heaven! This restaurant no longer serves them as they now have a different owner/chef, but I got to know the chef and his family, and he told me how it is made. Though I haven't made an attempt to make those yet but soon and when I do, I'm sure you'll hear about them.

Anyway, before I start making the truffle stuffed beignets I thought I would try making the regular beignets. However after a twice-failed attempt Sunday night, I took a break and thought I would do some research on Monday. As a follower of Michael Ruhlman's blog, to my surprise I found on Monday morning, he posted a new entry about a pate a choux recipe which is the dough I need to make beignets. I was so excited that I wrote him and told him about the synchronicity. He was nice enough to reply and told me to check the ratio of the recipe as his new book is all about ratio. He uses this particular ratio for his pate a choux, 2 parts water, 1 part butter, 1 part flour and 2 parts eggs. So I thanked him and told him I can't wait to go home and make my attempt number 3.

Well I went home last night and did exactly what he said and this time, the dough was light and fluffy, it was exactly the way it should be. I was so excited. This is such an easy recipe, anyone can do it so go ahead and give it a try.


Beignets (this recipe makes about 2 dozen)
1 cup of water
1 stick of butter
1 cup of flour
4 eggs
2 tbsp of sugar
1/4 cup of chopped pecans (or any nuts you like or nuts are optional)
1/4 cup of powdered sugar

Boil water, butter, salt and sugar in a pot in high heat until it comes to a rolling boil.
Take the mixture off the heat then add in the flour and stir rapidly.
Put it back on medium heat and keep stirring until all the water is absorbed into the flour and the dough will pull to the side of the pot, cook for another minute or so.
Take it off the heat and let cool for about 5 minutes.
In another pot, heat some vegetable or canola oil for frying.
While the dough is cooling, you can add chopped pecans or any nuts you like.
Pour the mixture in a standing mixer fitted with the paddle.
Add one egg at a time, and mix until the egg is completely absorbed before adding the next egg.
The dough will become a bit sticky like a paste.
Using a teaspoon, scoop about a teaspoon or less dough, use another teaspoon to push the dough into the pot of oil for deep frying.
The dough will puff up and get larger, fried until golden brown.
Finish them with powdered sugar.

By the way, if you don't have a standing mixer, you can do this by hand with a wooden spoon and just stir. Be sure to let the pot cools before adding the eggs. These are best to enjoy while they are hot, so make a batch and share with your friends and family.
Related Posts Plugin for WordPress, Blogger...